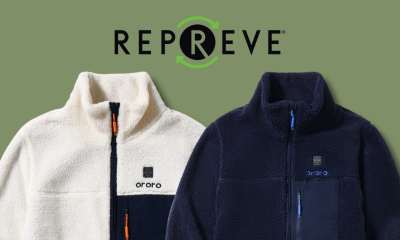
So you’ve made an ORORO purchase and are ready to stay warm no matter where you go. We’re here to guide you. First, thank-you for becoming part of the ORORO family! We’re ecstatic to have you join the many merry folks enjoying warmth on-the-go.
Second, let’s get you up to speed on how to use your new heated clothing.
All About Batteries

Your ORORO heated clothing is powered by UL-certified rechargeable batteries that provide up to 10 hours of heating. You’re also backed by our best-in-industry 3-year warranty for the carbon-fiber heating elements and a 1-year limited warranty on all batteries.
All ORORO heated apparel comes with a battery and charger included so you’re able to get your garment charged up and ready to go. It’s important to note that we don’t recommend using non-ORORO batteries or chargers with your ORORO heated clothing. We suggest you only use the original ORORO charger and battery for safety concerns. Should you ever need a replacement battery or charger, we’ve got those!
A couple of cool features about our batteries:
- Use them to charge your mobile phone on-the-go with a USB connection
- Our batteries are cross-functional from jackets to vests to hoodies
Learn more:
- Why ORORO batteries are better? Find out here.
- How to get more info anout ORORO batteries? Find out here.
1. Charge Up Your Battery

Lasting warmth with ORORO heated clothing begins with a full charge for your battery. Plug your charger in and let the battery charge for about 8 hours, especially before first use. When it’s fully charged, the lights on the battery will remain solid and stop blinking.
2. Read the Manual
We know it’s tempting to just dive in without reading the manual, but precautions are always important. Please read your User Manual for safety instructions.

Make sure not to use heated clothing on children, people with disabilities, or those who are sensitive to heat. We also don’t recommend using heated apparel on people with implanted cardiovascular devices.
3. Load it Up

Once your battery is fully charged, insert it into your gear.
- Locate the battery pocket on the inside of your heated gear.
- Inside this pocket, you’ll find a power cable. Insert it to the battery’s port.
- Once connected, place the battery inside the pocket and close the zipper.
- Start "boost mode".
4. Time to Heat Up

Once your battery is connected to your gear, it’s time to begin "boost mode" aka the highest heat provided quickly.
- Locate the ORORO logo on your apparel—this is the power button.
- To turn your gear on, press and hold the button for 3 seconds.
The LED light will turn on. It will be red and blinking. This means that your gear is on boost mode. It will stay in boost mode for around 5 minutes.
Once your gear is sufficiently heated up, it will automatically switch to medium heat mode as signified by a white LED light.
5. Feel the Warmth
Once your ORORO gear is powered on and heated up, you can adjust the heating level. Select from three different levels: High, Medium, and Low.
To select a level, simply press the button until you find the color that matches your desired level.

Keep in mind that the lower the heat setting, the more your battery will last. Here’s what you can expect from the different heating levels:
- High: 3-4 hours
- Medium: 5-8 hours
- Low: 8-10 hours
6. Powering Down

When you’re finished wearing your gear, power off by pressing and holding the power button on your apparel for 3 seconds. You’ll know it’s off when the LED light turns off.
7. Caring for Your Gear
When you’re ready to wash your gear, you can do so in the washing machine.
- Remove the battery and place the plug back in the pocket, taking care to zip it back up.
- Place the garment in a mesh laundry bag.
- Wash gently in cold water.
We recommend you do not iron, bleach, dry clean, wring or twist dry your gear.
If you need to store your gear during warmer months, be sure to keep the battery away from moist or humid environments.
Want to learn more about how to wash your heated clothing? Find out here.
8. Ask Questions
Still have questions? We’re here to help. Just reach out to us at support@ororowear.com.
You can also check out the quick start videos here:
B20M Apparel Battery Quick Start Guide:
B22A Accessory Battery Quick Start Guide:
Thanks for joining our ORORO family. Stay toasty!


